
PluginWiz Sitemap Plugin
Overview
PW Sitemap is a powerful, feature-rich WordPress plugin that generates both XML and HTML sitemaps for your website. Designed to meet Google Search Console requirements, this completely free plugin helps improve your site’s SEO by making it easier for search engines to discover and index your content.
Perfect for: Small blogs, large e-commerce sites, business websites, and everything in between.
Key Features
XML Sitemap Generation
- Google Search Console compliant
- Supports all post types (posts, pages, custom post types)
- Customizable sitemap URL
- Individual sitemaps per post type option
- Automatic search engine pinging
HTML Sitemap
- User-friendly navigation for visitors
- Works with any theme
- Page builder compatible (Elementor, Beaver Builder, Gutenberg)
- Responsive design
- Customizable display options
Advanced Control
- Per-post priority and change frequency
- Exclude posts by taxonomy terms
- Include taxonomy archives, author pages, and date archives
- Custom last modification dates
Performance
- Intelligent caching system
- Gzip compression support
- Optimized for large sites
- Automatic cache management
SEO Features
- Automatic Google and Bing pinging
- robots.txt integration
- Customizable priorities and change frequencies
- Complete control over what's included
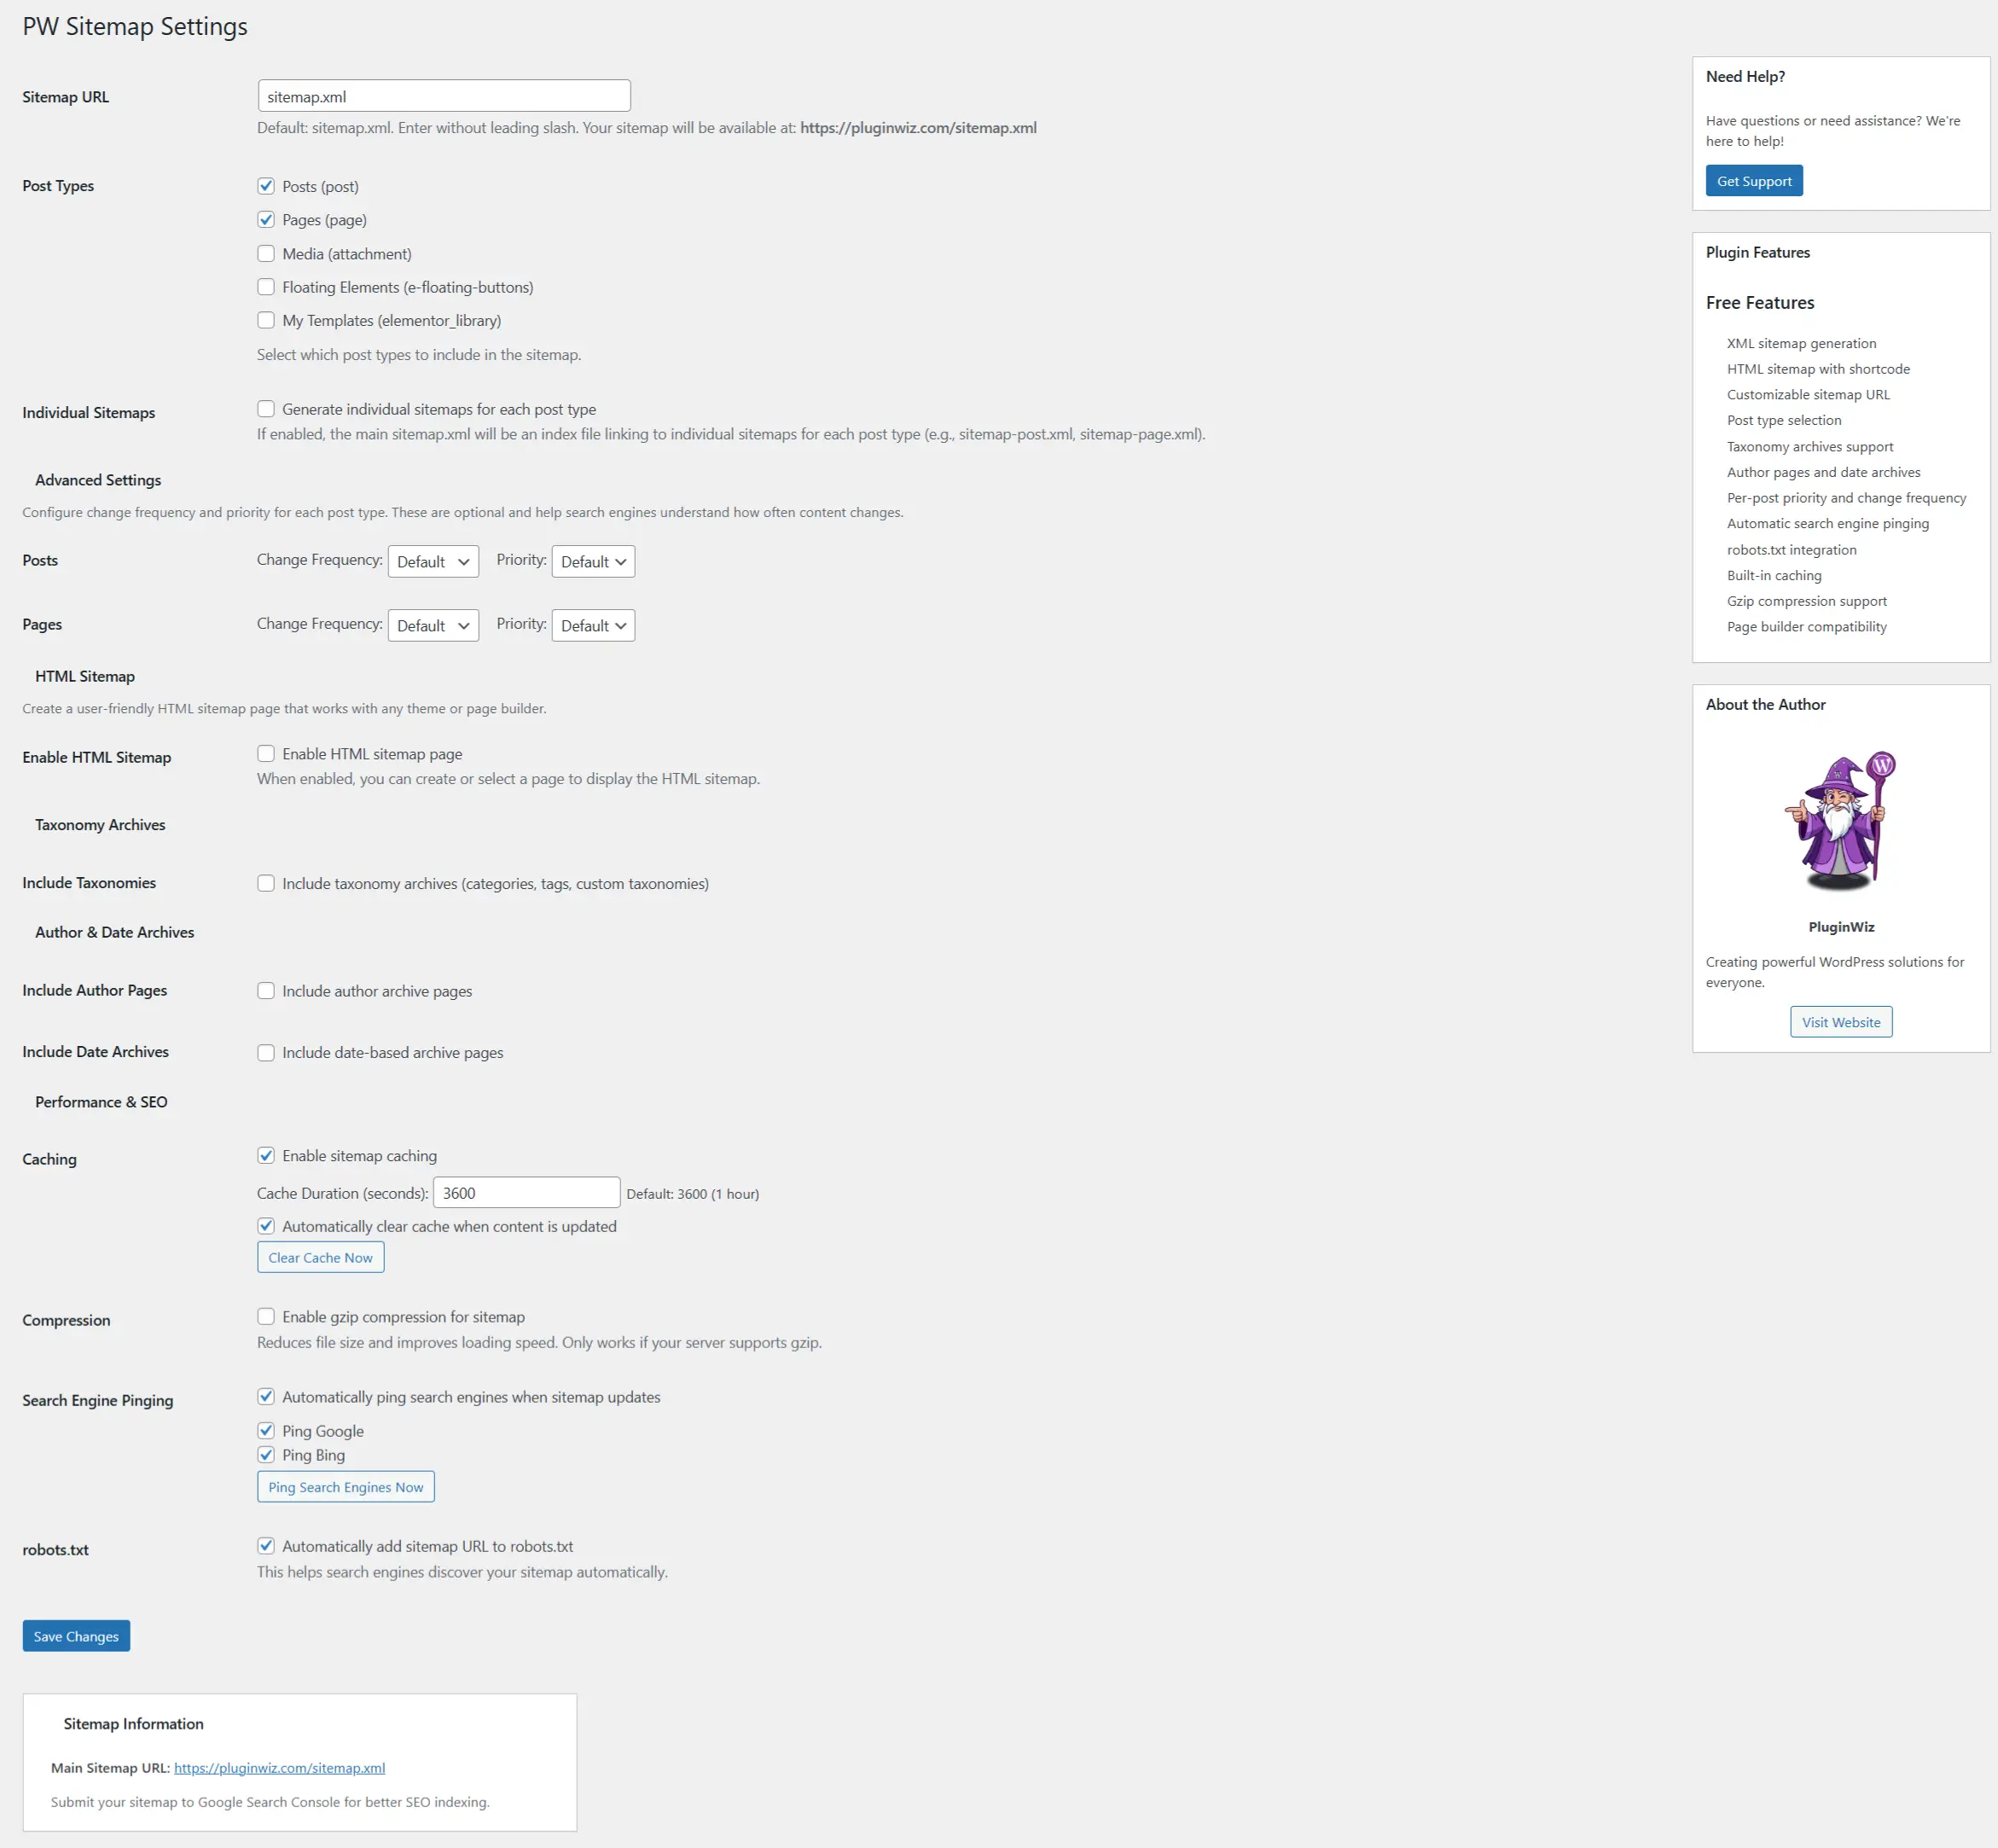
Table of Contents
Installation
Method 1: WordPress Admin (Recommended)
- Log in to your WordPress admin panel
- Navigate to Plugins → Add New
- Search for “PW Sitemap”
- Click “Install Now”
- Click “Activate”
Method 2: Manual Installation
- Download the plugin zip file
- Log in to your WordPress admin panel
- Navigate to Plugins → Add New
- Click “Upload Plugin”
- Choose the zip file and click “Install Now”
- Click “Activate Plugin”
Quick Start Guide
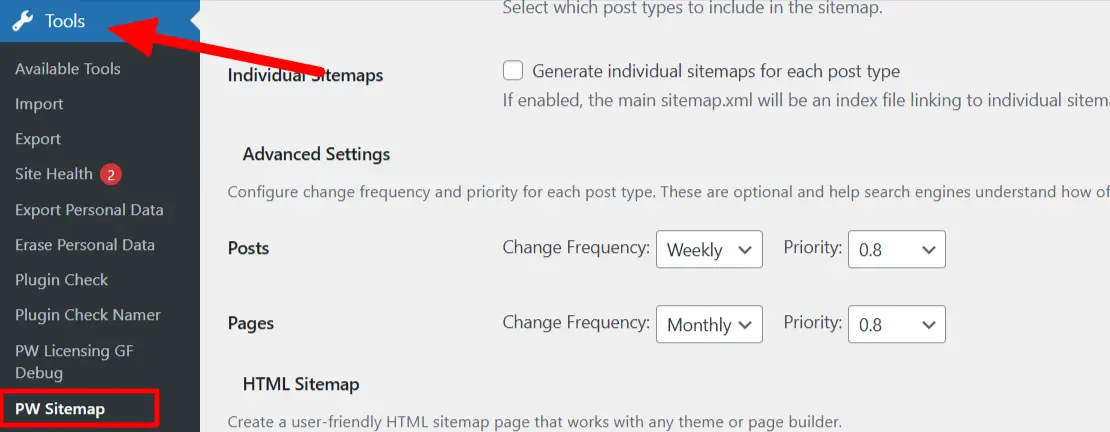
Step 1: Access Settings
After activation, go to Tools → PW Sitemap in your WordPress admin menu.
Step 2: Basic Configuration
The plugin works great with default settings, but you can customize:
- Sitemap URL: Default is
sitemap.xml(customizable) - Post Types: Select which post types to include
- Individual Sitemaps: Enable separate sitemaps per post type (optional)
Step 3: Your Sitemap is Live!
Once activated, your sitemap is immediately available at:
yoursite.com/sitemap.xml(or your custom URL)
You can verify it’s working by visiting the URL in your browser.

Detailed Configuration
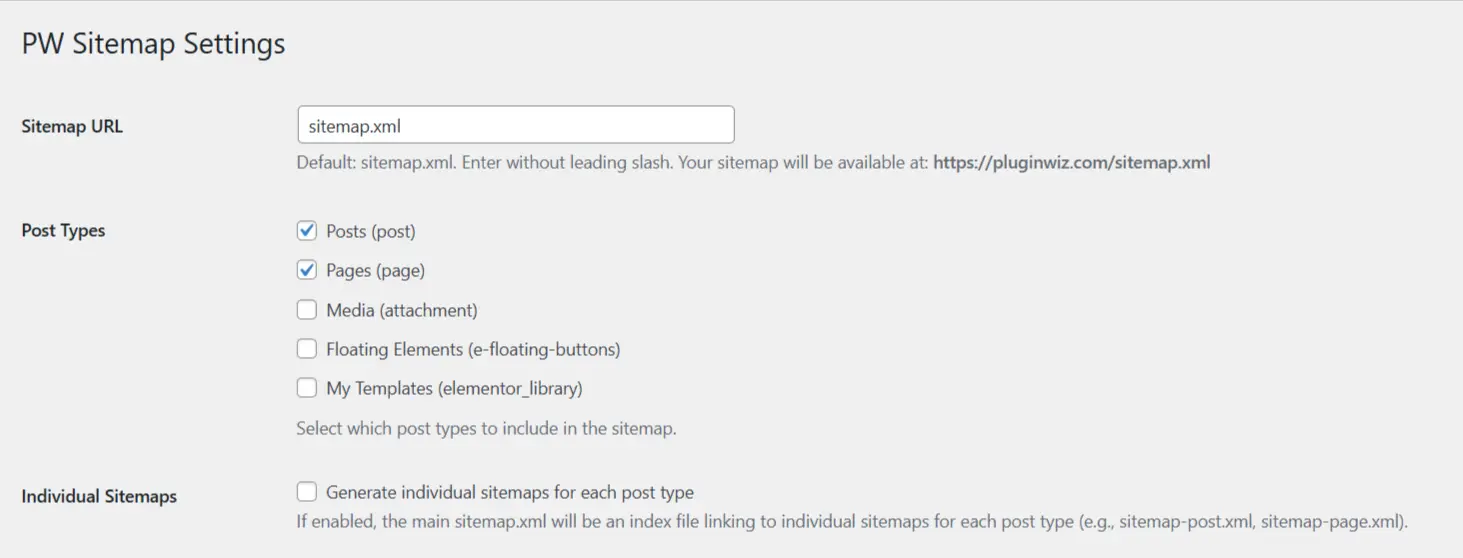
Post Types Settings
Location: Tools → PW Sitemap → Post Types section
Select which post types to include in your sitemap:
- Posts
- Pages
- Custom post types (automatically detected)
Tip: Only include post types that are publicly accessible and should be indexed by search engines.
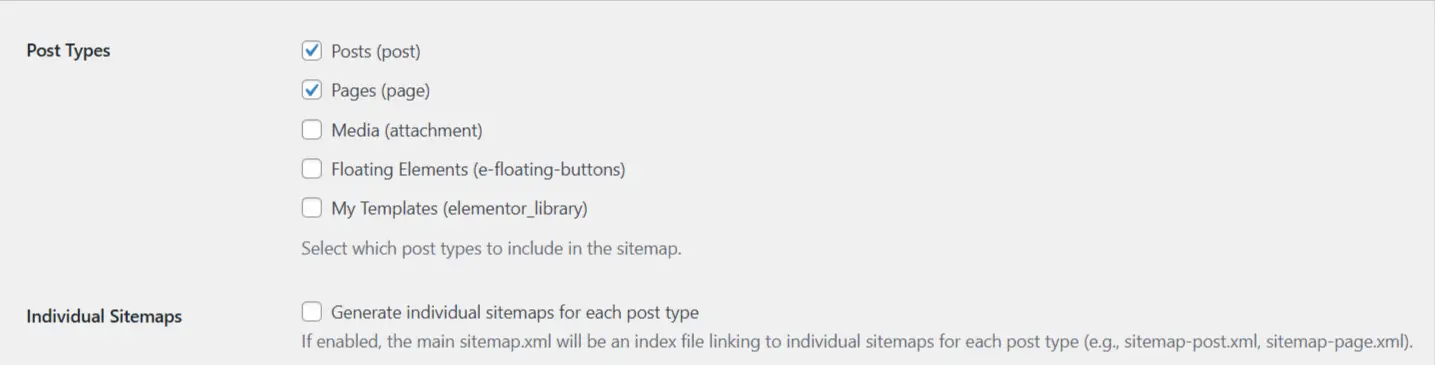
Individual Sitemaps
Location: Tools → PW Sitemap → Individual Sitemaps option
When enabled, creates separate sitemaps for each post type:
sitemap.xmlbecomes an index filesitemap-post.xmlfor postssitemap-page.xmlfor pages- etc.
Benefits:
- Better organization for large sites
- Easier to manage specific content types
- Recommended for sites with 1000+ URLs

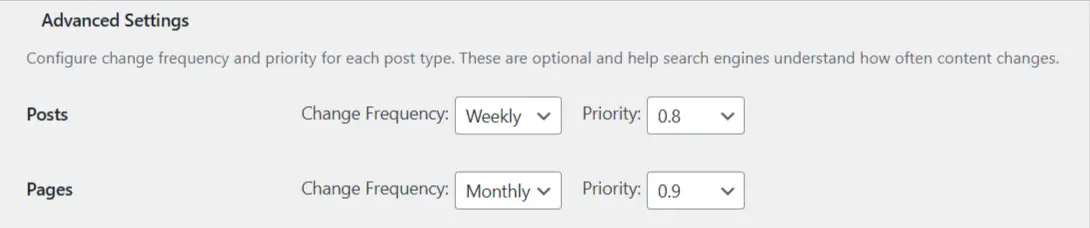
Advanced Settings
Location: Tools → PW Sitemap → Advanced Settings
Configure change frequency and priority for each post type:
- Change Frequency: How often content is updated (always, hourly, daily, weekly, monthly, yearly, never)
- Priority: Importance relative to other pages (0.0 to 1.0)
Default Values:
- Posts: Weekly, Priority 0.8
- Pages: Monthly, Priority 0.9
- Homepage: Daily, Priority 1.0
HTML Sitemap Setup
Enable HTML Sitemap
Location: Tools → PW Sitemap → HTML Sitemap section
- Check “Enable HTML sitemap page”
- Select an existing page or create a new one
- Click “Create New Sitemap Page” (if creating new)
The shortcode will be automatically added to the page.
Shortcode: ['pw_sitemap'] - *Note: Remove the '' from the shortcode.
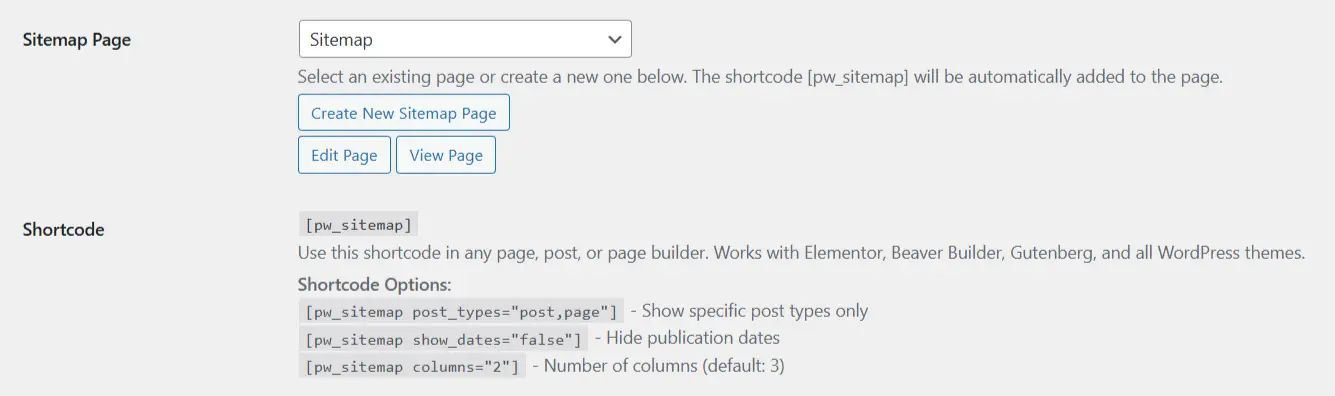
Using the Shortcode
The HTML sitemap uses a shortcode that works anywhere:
Basic Usage:
Shortcode: ['pw_sitemap'] - *Note: Remove the '' from the shortcode.
With Options:
['pw_sitemap' post_types="post,page" show_dates="true" columns="3"] - *Note: Remove the '' from the shortcode.
Shortcode Parameters:
post_types: Comma-separated list of post types (e.g., “post,page”)show_dates: Show publication dates (true/false, default: true)columns: Number of columns (default: 3)
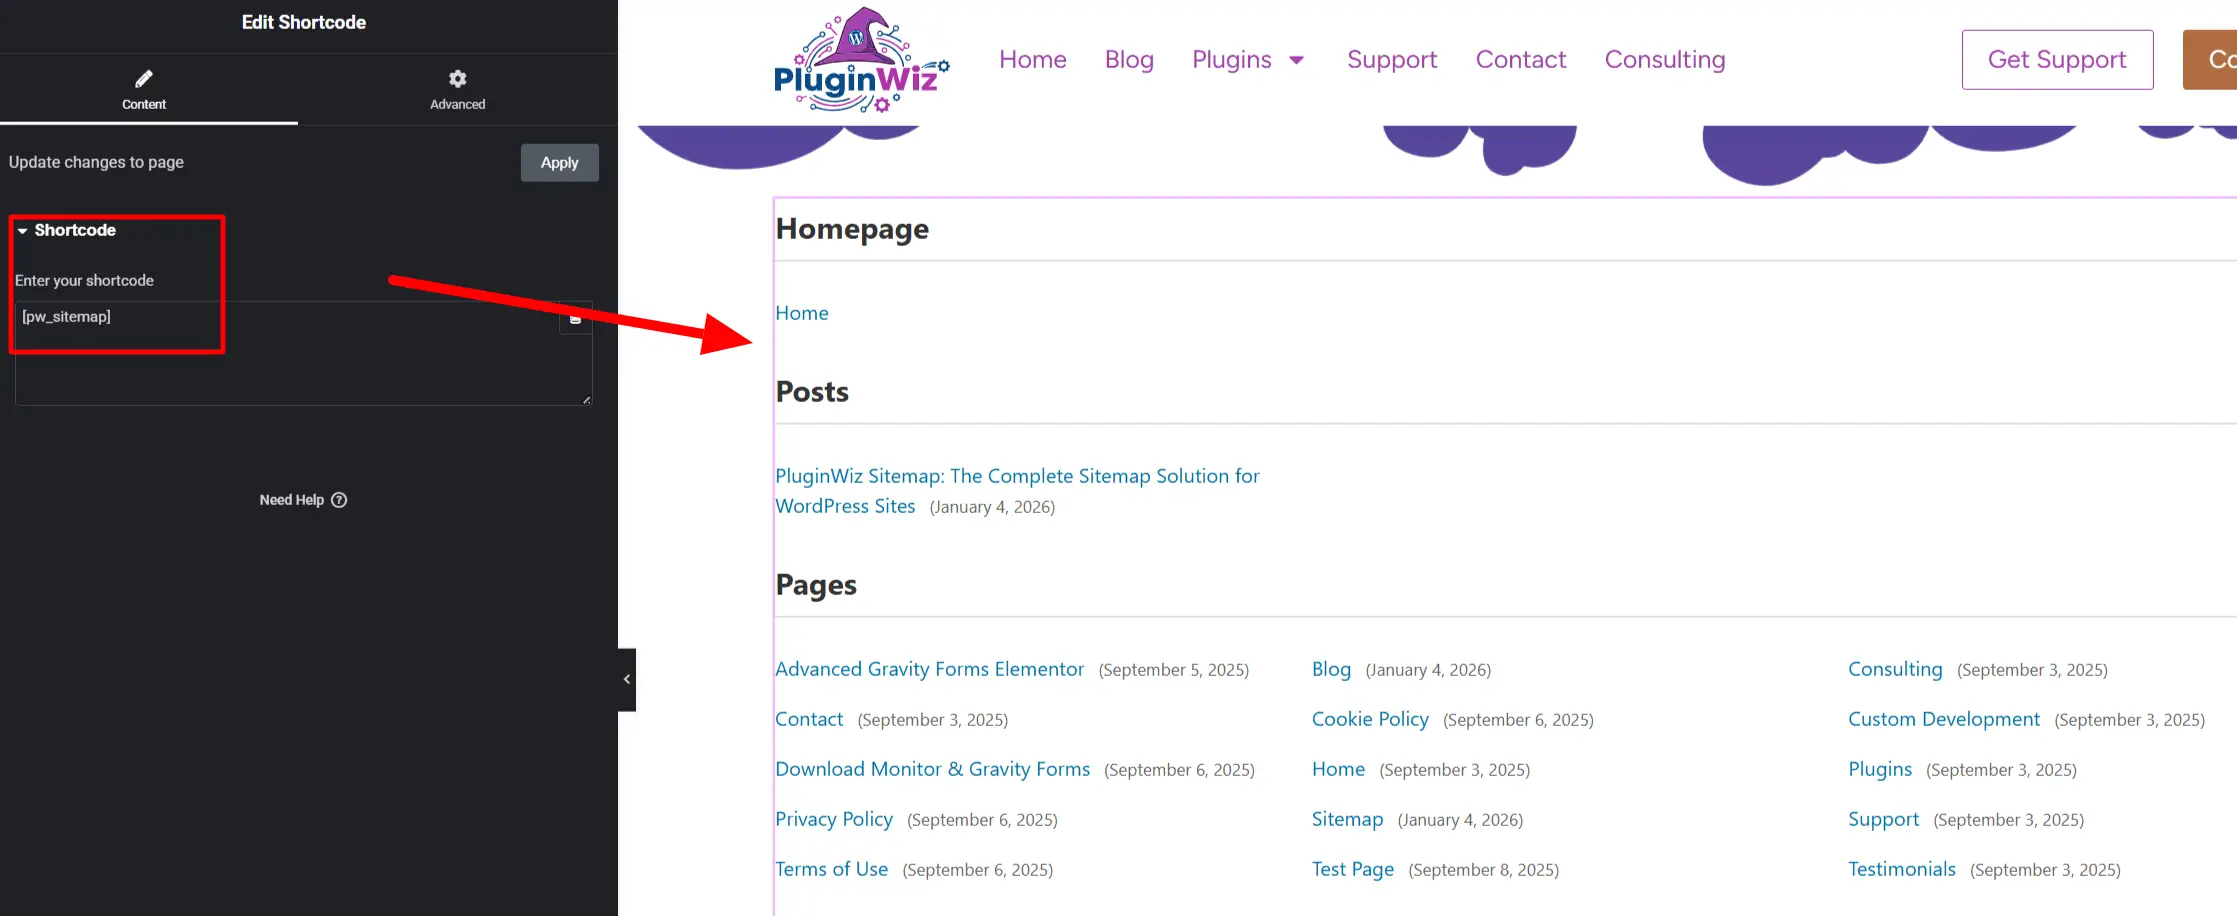
Page Builder Integration
The shortcode works with all major page builders:
- Elementor: Add a Shortcode widget, paste the shortcode
- Beaver Builder: Add a Text Editor module, paste the shortcode
- Gutenberg: Add a Shortcode block, paste the shortcode
- Classic Editor: Paste the shortcode directly in content
Taxonomy Archives
Enable Taxonomy Archives
Location: Tools → PW Sitemap → Taxonomy Archives section
- Check “Include Taxonomies”
- Select which taxonomies to include:
- Categories
- Tags
- Custom taxonomies (automatically detected)

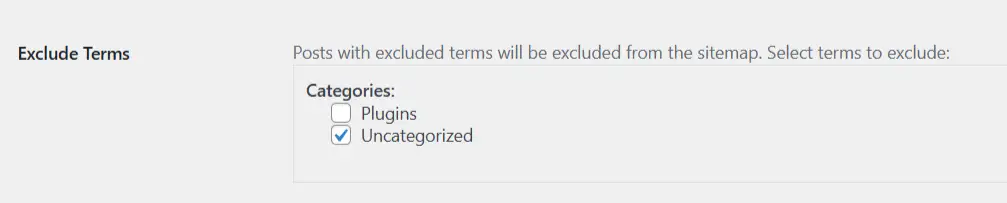
Exclude Specific Terms
You can exclude specific taxonomy terms from the sitemap. Posts assigned to excluded terms will also be excluded.
Use Cases:
- Exclude test categories
- Hide private content
- Remove outdated content categories
Author Pages & Date Archives
Author Pages
Location: Tools → PW Sitemap → Author & Date Archives section
Enable to include author archive pages in your sitemap. Only authors with published posts are included.
Settings:
- Change frequency (default: weekly)
- Priority (default: 0.5)

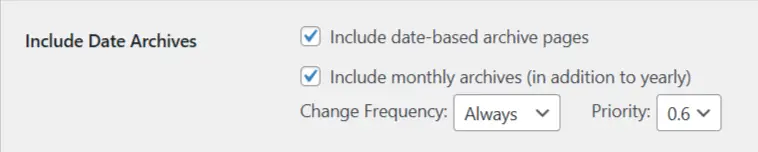
Date Archives
Enable to include date-based archive pages (yearly, and optionally monthly).
Settings:
- Include monthly archives (optional)
- Change frequency (default: monthly)
- Priority (default: 0.4)
Per-Post Control
Accessing Per-Post Settings
When editing any post or page, you’ll see a “PW Sitemap” metabox in the sidebar.
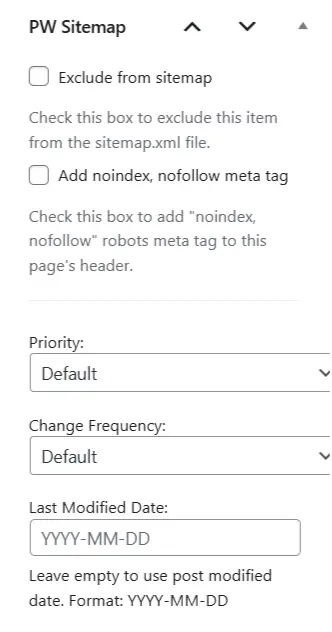
Options Available
- Exclude from sitemap: Checkbox to exclude this specific post/page
- Priority: Override default priority (0.0 to 1.0)
- Change Frequency: Override default change frequency
- Last Modified Date: Custom date override (format: YYYY-MM-DD)
Use Cases
- Exclude specific pages (privacy policy, terms, etc.)
- Boost important pages with higher priority
- Mark frequently updated content with higher change frequency
- Override dates for republished content
Best Practices
For Small Sites (Less than 100 pages)
- Use default settings
- Single sitemap (don’t enable individual sitemaps)
- Include posts and pages only
- Enable automatic pinging
For Medium Sites (100-1000 pages)
- Consider individual sitemaps
- Include relevant taxonomies
- Enable caching
- Customize priorities
For Large Sites (over 1000 pages)
- Enable individual sitemaps
- Enable caching with longer duration
- Enable compression
- Include all relevant content types
- Monitor performance
SEO Recommendations
- Set appropriate priorities:
- Homepage: 1.0
- Important pages: 0.8-0.9
- Blog posts: 0.7-0.8
- Archives: 0.4-0.6
- Set realistic change frequencies:
- Frequently updated: daily or weekly
- Occasionally updated: monthly
- Rarely updated: yearly
- Keep sitemap updated:
- Enable automatic cache clearing
- Enable automatic pinging
- Monitor in Search Console
- Don’t over-optimize:
- Use defaults unless you have a specific reason
- Focus on content quality over sitemap tweaking
FAQs
Is PW Sitemap free?
Yes! PW Sitemap is completely free with all features included. There is no premium version.
Does it work with WooCommerce?
Yes! PW Sitemap automatically detects and supports WooCommerce products and other custom post types.
Can I customize the sitemap URL?
sitemap.xml).
Will it slow down my site?
No! PW Sitemap uses intelligent caching and optimized queries. It’s designed to perform well even on large sites.
Do I need to manually submit to search engines?
No! With automatic pinging enabled, search engines are notified automatically. However, you can still manually submit in Search Console for verification.
Does it work with page builders?
Yes! The HTML sitemap shortcode works with all major page builders including Elementor, Beaver Builder, and Gutenberg.
Can I exclude specific posts?
Yes! Each post and page has a metabox where you can exclude it or customize its settings.
Does it support custom post types?
Yes! PW Sitemap automatically detects and supports all public post types.
Support
For support, feature requests, or to report bugs:
- WordPress Repository: Coming Soon
- PluginWiz Website: PluginWiz Support
- Custom Development: Contact Us
Download
Download PW Sitemap:
- WordPress Plugin Repository – Link coming soon
Requirements:
- WordPress 5.0 or higher
- PHP 7.2 or higher